Figure 8 Disbudding Tutorial
This is a step by step tutorial on how to do a figure 8 disbudding procedure.
When I disbud a kid, especially when doing bucks, I do go beyond the "copper ring" and do a full thickness burn. I find there is less chance of scurs developing when this method is used. The cells that will become horns are very tenacious and if just a few are left behind, scurs will often develop despite disbudding. If the entire cap is removed, there are no horn cells left to reattach and become scurs. This method can also be performed with just a copper ring but keep the increased likelihood of scurs in mind.
It is important to be sure your iron is extremely hot for an effective disbudding. I red hot iron allows you to complete the procedure with minimal time spent with the iron actually in contact with the kid's head. Avoid using extension cords, the friction within the cord takes away from the power available to the iron. I use a Rhinehart X30 disbudding iron with the standard 1/2 inch tip. The mini tips are often to small to completely cover the horn bud.
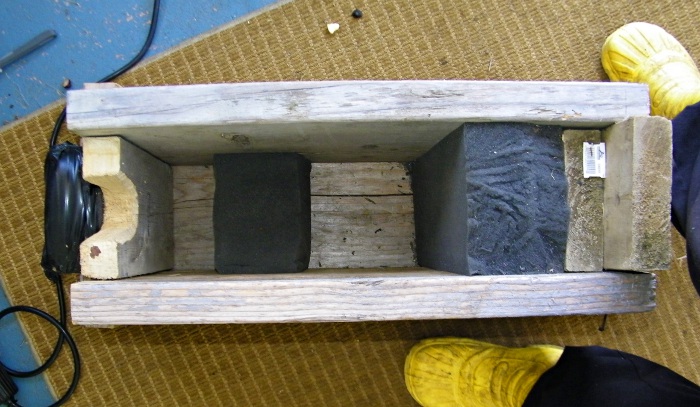
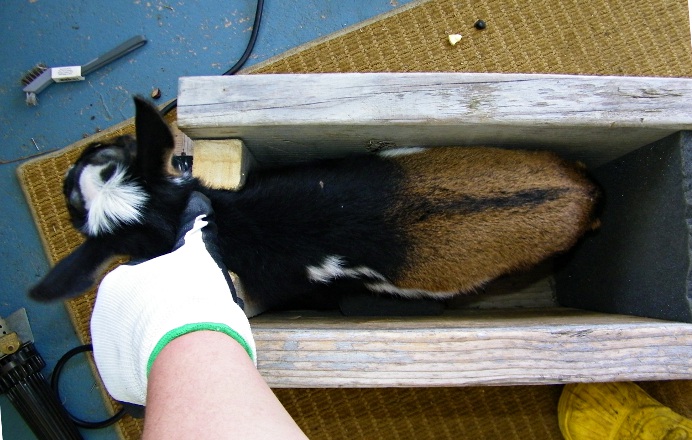
Be sure the kid is adequately restrained for the procedure. I use a home made disbudding box that can be adjusted for different size kids with foam inserts.
1. Personally, I shave the kid's head prior beginning the disbudding procedure. This allows me to visualize exactly where the horn bud is located and also to visualize the size and location of the horn flutes if I am working on a buck kid. The horn buds of a buck kid are tear drop shaped, with the flutes extending from in front of the horn bud inward toward the bridge of the nose. Many scurs develop from this area and the figure 8 method prevents that from happening. The actual size of the horn flute varies; some bucks will have just a bit of a tear drop, other will have extensive flutes like the buck kid pictured in this tutorial.
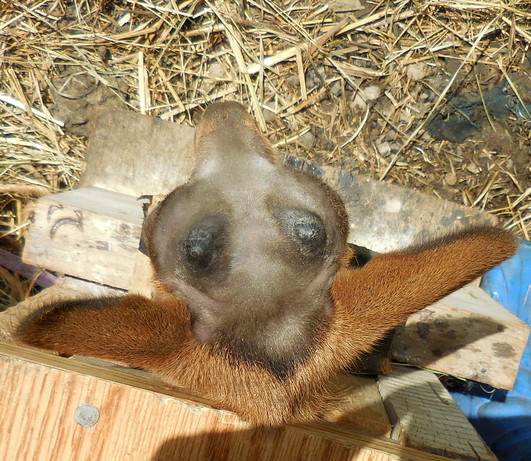
2. Center the iron directly over the horn bud. Apply the iron firmly, pressing down and twisting around the vertical axis to rapidly burn down. when you lift the iron, the ring will usually show white in places, copper color in others. I do not apply the iron for longer then 5 seconds at any one time. Lift the iron completely off of the head to allow the site to cool.
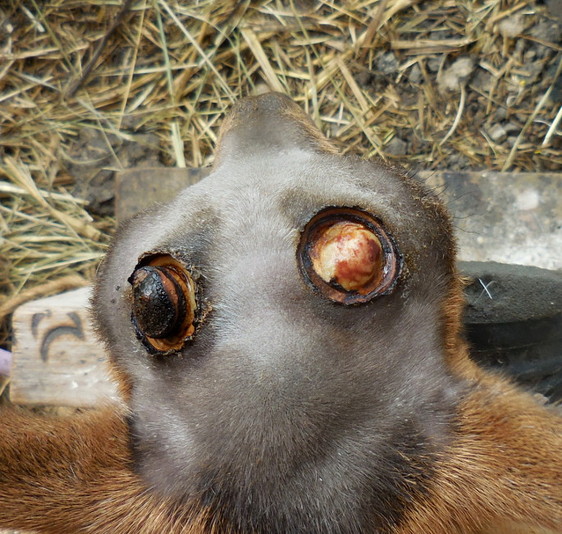
2. Repeat the procedure over the second horn bud. Again, center the iron over the bud and apply firmly while rotating the iron around it's vertical axis. The photo below shows the "copper ring" stage where many people will consider the job complete.
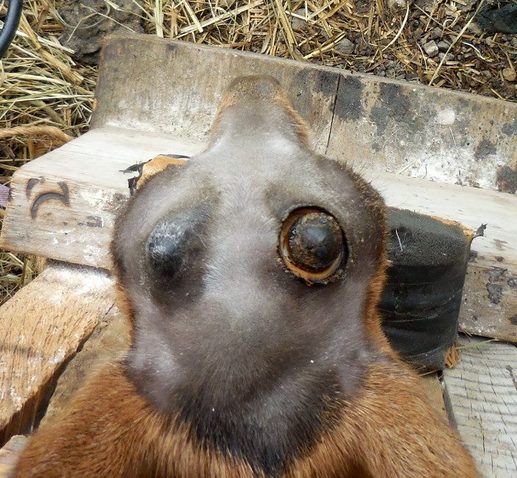
3. At this point, I go back to the initial site and carefully center the iron to land directly within the ring produced in the initial burn. Reapply with firm pressure and again twist around the vertical axis. This second application of the iron should go full thickness. When you see white all around the burn site, take the edge of the iron tip and place it against one side of the cap. Quickly make a flicking/scooping motion with the tip of the iron and the cap should flick off of the head. If it does not flick off the head, look around the cap and apply the iron over any area that is not down to white.
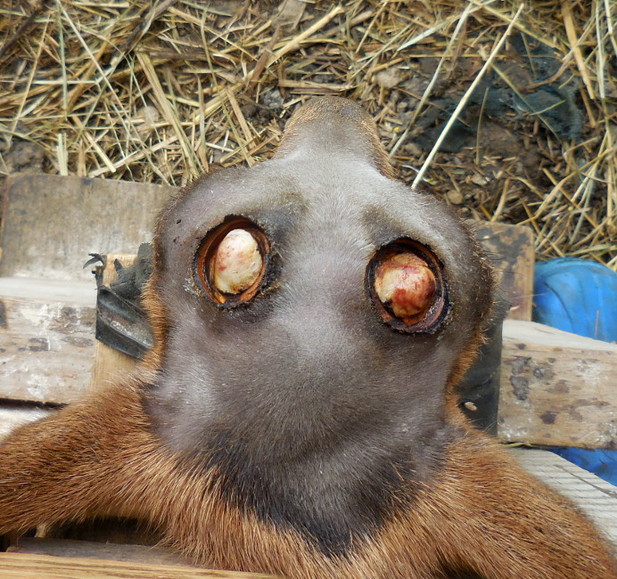
4. Notice how the area is raw in the photo above. It must now be cauterized and sealed. Take the iron, center it directly over the exposed area, and apply for a second or two to seal the site. When you lift the iron, the exposed area should have a copper tinge and no longer appear white/raw. If you look at the photo above and below you should be able to see the difference.
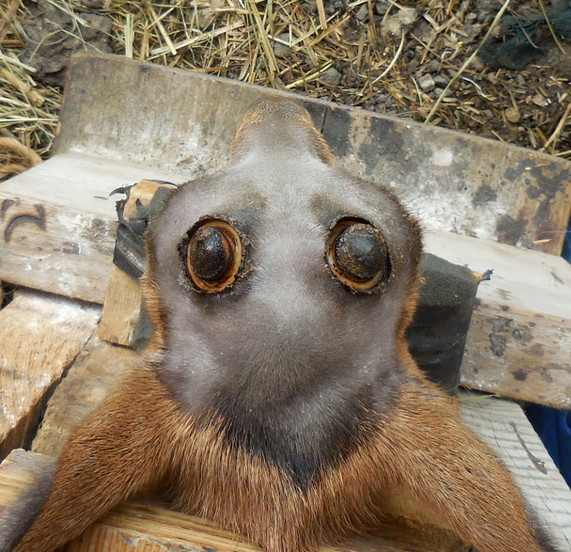
5. Go back to the second horn bud and repeat the procedure described above. Reapply the iron over the cap, apply firmly twisting around the irons vertical axis, flick the cap off, and seal the site. The photo below shows both horn bud sites with the caps removed and sealed. If this was a doe kid, you would be finished at this point as they rarely show flute development.
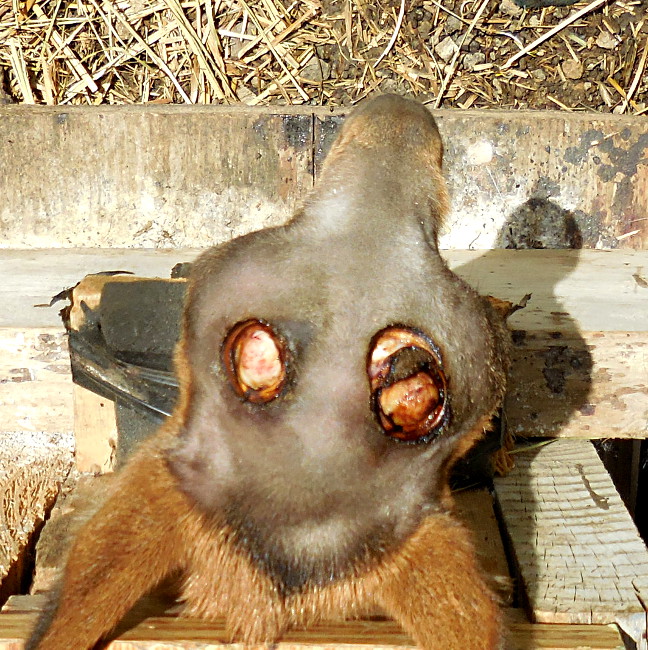
Notice the darker, triangular areas extending forward diagonally from the burn sites toward the nose. These are the horn flutes that become the leading edges of the horns in a buck. If not burned, they will continue to develop and can become quite substantial scurs.
Notice the darker, triangular areas extending forward diagonally from the burn sites toward the nose. These are the horn flutes that become the leading edges of the horns in a buck. If not burned, they will continue to develop and can become quite substantial scurs.
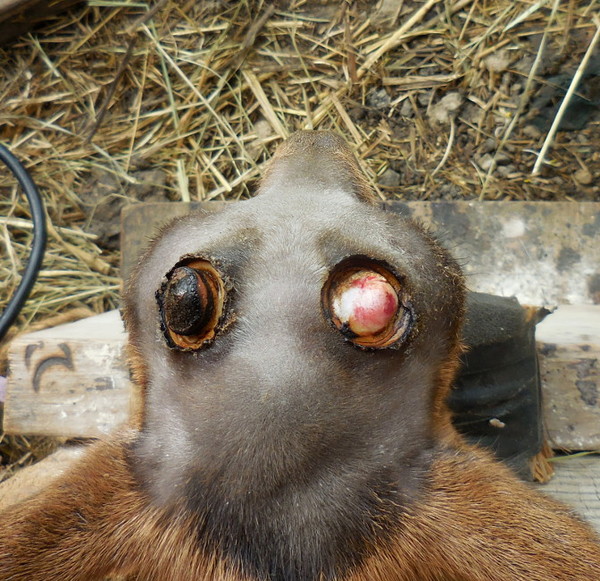
6. Now center the iron over the first horn flute. Be sure that the very tip of the flute will be included in the area covered by the iron. Again, apply firmly and rotate the iron. This area will burn down much more quickly then the horn bud itself. I usually angle the iron so the tip points slightly toward the top of the head/bud area to prevent it from sliding downward over the head. Use the tip of the iron to flick the area that has separated off of the head, apply the iron for a second or two to cauterize and seal the area. Repeat on the second side.
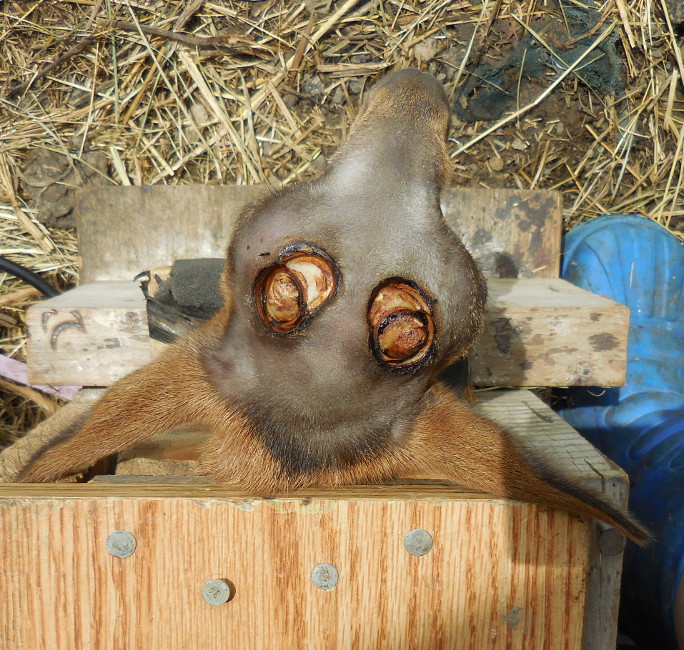
7. This is the completed figure 8 burn. The area is neat and properly cauterized. I personally do not apply any wound coat over the disbudded area. I like to be able to keep an eye on the area and colored wound coat products do not allow me to do so. I hope this tutorial helps. :-)
This is my homemade disbudding box. It is large enough to accommodate full sized kids and can be adjusted with foam inserts to fit various sized Nigerian Dwarf kids. I made it with scrap 2 x 6 lumber and sit on the lid above and behind the kid to perform the disbudding procedure.
A different kid in place in the box. I will put the lid on and sit above and behind the kid.
Tutorial courtesy of Zanzabeez Nigerians.
